What?! Improve these already kick arse products!
Yeah baby, we are talking about serious kick arse here!
Let's face it. No design is perfect, every design can be improved upon. If someone says his design is "blameless" or "perfect", you know that person has been boozing too much. Or maybe he's some salesman.
So on this page, I'll try to list down improvements you can make to your diyparadise products.
Up the value quotient!
Improve sonics!
Get your friends jealous!
blah blah blah... Okay, let's start.
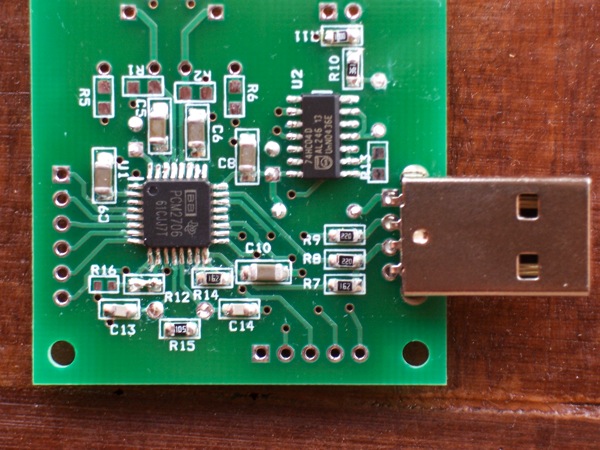
USB Convertor
The easiest and best improvement will be to modify the SPDIF output stage. Right now this circuit consists of a simple TTL-SPDIF convertor. Just solder the primary of your digital pulse trans across the vias labeled SPDIF OUT, and solder the secondaries to your output RCA wiring. You could use the Newava Technology S22083 1:1 pulse trans, available from Digikey. Or the Scientific Conversion SC982-04.
The more observant among you will notice that the Newave is a 1:1 trans while the SC is a 4:1. By right, the latter is more appropriate as SPDIF output is only 0.5V so stepping down the signal voltage is correct but I never noticed anything wrong using the former. So rest easy and just do it.
I don't recommend you getting a toroid and winding some wires and passing it off as a digital pulse trans. Just because you use silver doesn't mean anything at all. These trans are engineered/optimized for digital communication, not some hack job.
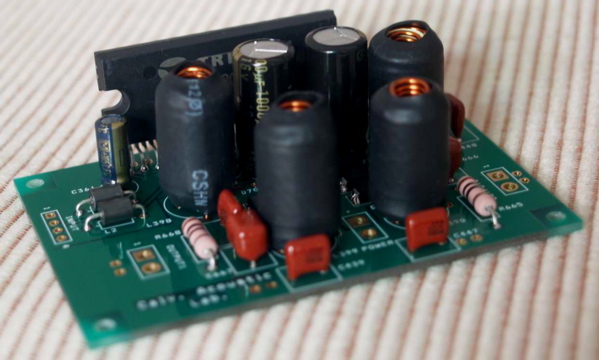
Charlize and Charlize2
Believe it or not, we have done so much work to Charlize2 that if you have the first version, just go grab the follow up version! I'm sorry but you can't mod your 1 to our 2. [hey, you can't mod your wife to look like Charlize okay?]
Guess the best upgrade you could do is to try various power supplies and see which works best. In our opinion here, nothing beats a high quality rechargeable sealed lead acid battery. Have tried various makes and all sound different. Read Graham and Denise's report here.
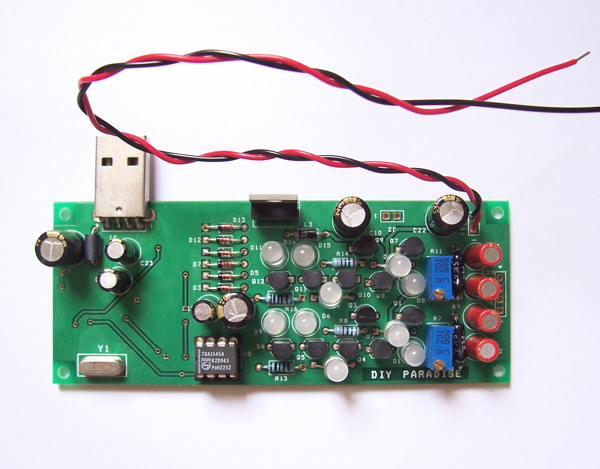
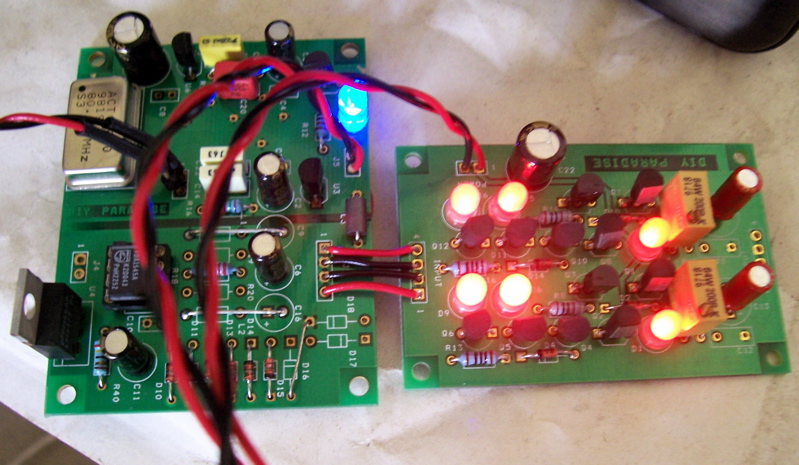
Rudolf Broertjes' Solid State I/V Gain Stage
If you have been following the diyers forum, you may notice that Ronald Verlaan and later Ole Schüsseler suggested LEDs instead of diodes for D2/D4 and D10/D14.
Another useful tweak is SUPER E the output Black Gates capacitors. I know these caps are facing extinction so please grab them now while they are still available [please don't ask from me. Oh well, if you have to, they are 1000 EUROS a pop!] You know folks like to say Less is More but in this instance, More is the way to go!
This gain stage runs off at 12V but at higher voltages, she sounds better! Please be careful here as the power supply capacitor C22 is rated 25VDC only. So make sure you don't go higher. [I use 24VDC myself and she's been singing for months.]
The I/V resistor could be swapped to your personal preference. Use whichever audiophile approved boutique part as you (or your wallet) sees fit. My personal preference here is the excellent Riken Gold but as these parts are no longer in production, I'm sorry I can't give/sell you any. [that's not true. i'll gladly trade for gold bars.]
Oh yeah, measure voltage across the I/V resistor and adjust the trim pot for half of your power supply. If this voltage is too high/low, some roughness or distortion may be present. Not good!
Monica2
If you have installed the RB SS I/V kit, the above applies but also, utilizing lessons from the USB Convertor's digital pulse trans tweak, put the trans at the INPUT. Yeah,
RCA Socket ---> 1:1 digital pulse trans ---> Monica2 PCB's digital input
Use the recommended Newava trans above.
Again on the forum, another forum member esidarapyid, recommended polystyrene capacitors across VDD/GND and VREF/GND on the TDA1545A chip. This is another awesome tweak! As these are bypass capacitors, the values aren't critical. I had good results from 100pF to 1200pF. Silver micas are great too!
Then Paul Needs contributed another awesome tweak here. Instead of referencing Vref to 1/2VDD, Paul suggested referencing to one diode drop, thus the last diode. To perform this tweak, remove the 22kohm resistor (labeled "223") and solder as shown.
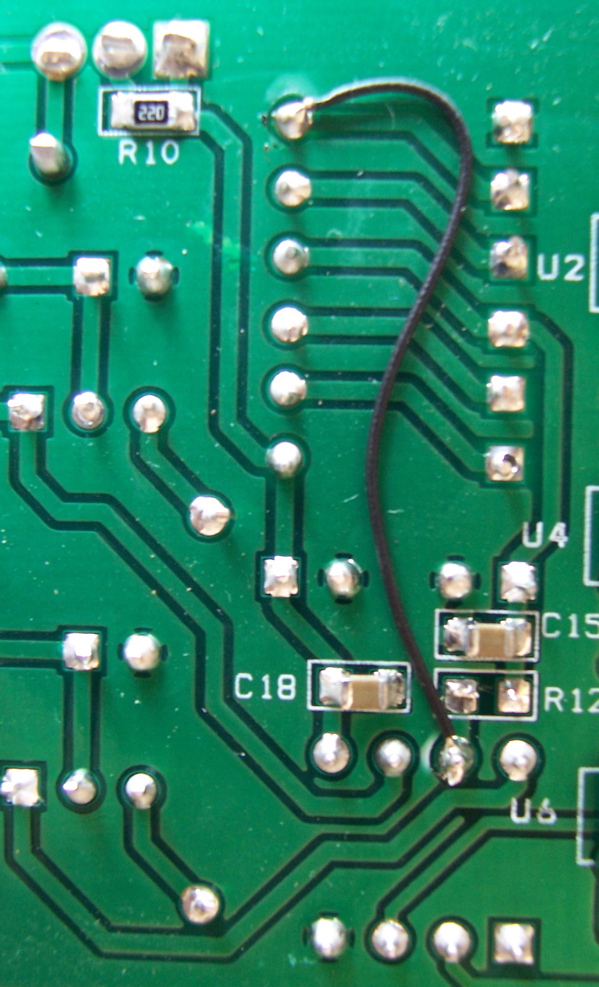
Don't be a klutz and short other pins. As always, solder/desolder ONLY on an electro-static safe sheet/mat, like the anti-static wrapper that houses your diyparadise product.
Paul also suggested giving a bit more current to the constant current source. Currently it's set at 50mA but Paul suggested going for 70mA. To do this, you need to have about 18ohms at R10 in above pic. If you are lazy to desolder R10 and solder in a 18ohm resistor, you could just parallel a 100ohm on top of the 22ohm of R10.
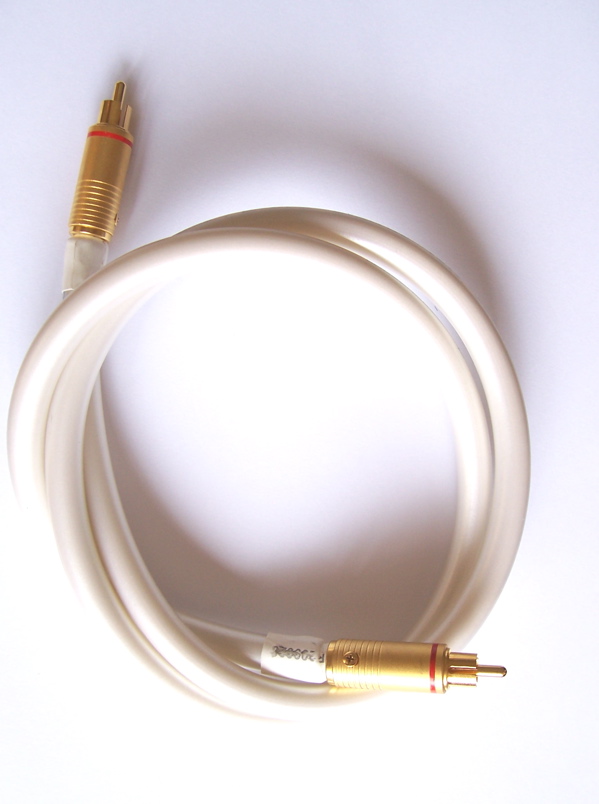
Use Whitesnake!
I have been using various DIY 75ohm coaxial cables and have been pretty satisified with them until one day Gabriel suggested this white-colour-unassuming-but-thick-as-garden-hose cable. It's so thick that I wondered how smart can it be?
Sorry for lame joke. Anyway, I tried it out and... Wow! Totally smoked whatever digital cables I had before. It was so good that one customer even ditched his purchase of a USD200 cable.
Check out the e-store!
USB Monica
Right now we have the Enhanced USB Monica, but if you have the previous version, you could apply the tweaks to the RB SS I/V stage and also TDA1545 circuitry. Actually the Enhanced version already has these tweaks done. See how luck you folks are?
Note that the polystyrene Paul Needs tweak is not done on your PCB version. Only in finished products. [please don't ask me for polystyrene caps either. if you wish, i'll exchange for 2 gold bars!]
Aha! Since she's software controlled, you bet your software has an effect on her sonics too! I like Macs here, as well as Linux. I stay away from Windoze as much as possible...
My sincere thanks to these gentlemen mentioned above for their ideas, suggestions and generosity.
Please note that the finished products (or "Plug and Play") incorporate all the above mentioned tweaks.
Hey! Aren't we on a roll here? Let's continue...
Use wood!
Wood chassis really sounds beter. Looks better too!
Hifi products tend to look industrial, coming in cold soulless steel or aluminium, with little touches of wood for a "touch of class".
Pure bollocks. Try housing in wood chassis and listen for yourself.
Not to be discounted, nor under-estimated.
Having a good brew in hand.
Silence in the listening area. Give your wife your credit card and ask her to shop for hours! [be smart. call the credit card company to cap a limit first!]
Great music. Please, not those audiophile crazy, sound effect mumbo jumbo junk passing off as music. I mean MUSIC! REAL MUSIC! You should be able to make an emotional connection with the music. Listen, appreciate, emphatize, celebrate... And stop all that analyzing shit. See, there's "anal" in "analyze".
Lastly, as with all diy projects, please exercise caution, especially with electro-static discharge, when performing these tweaks. I have said it before and I'll say it again. The soldering iron is mightier than the pen/sword. But this doesn't mean you could wield it like crazy. BE CAREFUL.
Good luck!